Saturday, August 30, 2008

Home Card


Here is one card idea with two different layouts and sizes. Graphics are by Laurie Furnell from pccrafter.com. The first card is 5 1/2 " x 8". Dotted Swiss Cuttlebug embossed black background is mounted on white cardstock. Two strips of black and white ribbon was added to the bottom.

The second verision, 5 1/2" x 4 1/4", is embossed swirl background. A metal heart charm was threaded onto a single loop bow.


Both cards were given a faux flocking to the background. Giving both cards an antique feel.

Monday, August 25, 2008

Autumn Card


I must confess, I did not finish the project that I wanted to post. It will have to wait for a future date. I am posting a card that I finished a week ago. Graphics are by one of my favorite artists,Laurie Furnell at pccrafter.com. The leafy lattice background is one of my GSD file creations. I have not figured out how to share with the new update RM 4.4. If you would like it anyway, let me know.

Saturday, August 23, 2008

Not much time to play this week. I have been busy registering students. Here is a quick birthday card I embossed with my Cuttlebug and added Mitzi graphic from pccrafter.com. I started with colored cardstock 8” x 5 ½”, white cardstock 11” x 5 ½”, Mitzi graphic and wording on photo paper. Emboss half the white cardstock, fold in half, and mount on the upper portion of the colored cardstock. I use a Scotch ATG machine for mounting. It is the best invention. Next trim around graphic and wording; mount wording on scrap white and colored cardstock and attach to card. Mitzi is mounted with pop dots (HINT: Because of the large area, I used only the scrap area around the pop dots.) I had a strip of colored cardstock I did not want to go to waste, so I used it to embellish the card and envelope. See ya Monday.

Monday, August 18, 2008

Peek-a-boo Boxs


These peek-a-boo box measure 2”x2”x1”. They are just right for a small birthday gift or a special treat. Graphics from pccrafter.com were printed on to 67 lb. cardstock with registration marks. Thank you Brenda Quintana for sharing your drawn template with me. Here is the GSD template for this cute little box. I have emailed Brenda for her link, and will post it as soon as she sends it.

Request for template are too many; here's the link for word document from Brenda. Here is the link to she sent me for her blog.

Saturday, August 16, 2008

Bottled Mail From USA

Add an extra surprise to a postal package by bottling your contents. I picked up a few things to send a package to a friends son in Iraq. I turned the Pringles into a cowboy hat, made a tic-tac-toe board, added my own packaging to the rest with the help of graphics from pccrafter.com. I used a GSD template for the covers of the mini Warm Delights. Here's my results:
My eyes were bigger thank my package. I will just have to put together another package in a couple of weeks and send the left overs. he he he

Monday, August 11, 2008

FYI

I updated my Craft Robo program. I was told I could down load in the old format. I am checking into it and will try and post the PDF file in the old format or at least a for those of you that would like it.

Saturday, August 9, 2008

Faux Chipboard

Photobucket


I love the look of chipboard. Unfortunately I can not cut chipboard with my model of Craft Robo. Here is how I created my Faux Chipboard:
Photobucket
1. cut 4 blank templates on heavy cardstock (I used 110 lb.)
2. glue the 4 templates together (I use wet glue the first time. It curled slightly and took a long time to dry)
3. cut top layer with words out of light weight patterned paper
4. glue to the top of the cardstock
Photobucket
Here is the GSD template for my Faux chipboard. This template will give you two different options.

Monday, August 4, 2008

Cuttlebug Embellished Bag


Here is the template for the magic window cover png/jpg. I feel sorry for you, if you have to cut this by hand. I love my Craft Robo…it is worth every penny I spent. When I registered my CR, there was a cute bag template for download. This of course is altered a little and I used background graphic from pccrafter.com. I posted a picture of the bag for you to see, since you have seen enough of the magic card. Happy crafting..see you Saturday with a new project.

Saturday, August 2, 2008

Magic Card Instructions

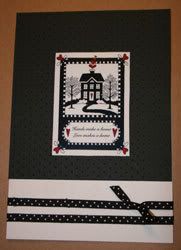
Window Magic Card template for Craft Robo is listed below. I used an 8 ½” x 14” sheet of card stock for the inside (or base of the card), and an 8 ½” x 11” printed or colored paper. I really like the look of the embossing on plain paper. Here is the template for png/jpg and my instructions. Finished card is quarter card size.
Materials:
8 ½” x 11” cardstock
5 ½” x 3 ¾” transparent sheet for printer
Scissors/craft knife
Bone folder
Glue stick/double sided tape
Graphic of choice
Glue Dots
Stapler
Ribbon
Embossing file
Steps:
1. Set printer on borderless print.
2. Open template in graphic program. Place graphic picture on sliding panel. Bottom of graphic toward the “T”. Print on cardstock.
3. Remove template layer, making sure not to disturb the graphic. Print graphic on the clear sheet. This will be cut ½” narrower than sliding panel. DO NOT CUT OUT YET. I have a trick for you.
4. Cut on solid lines and fold all dotted lines on cardstock template to the inside.
5. Position sliding panel under the clear sheet and line up graphic. Once you have it line up, put a glue dot on each upper corner of cardstock. This will help to hold the graphic in position. Trim the clear sheet to match the sliding panel. You can do this with or without the “T” on the end.
6. Fold ribbon in half forming a small “V” and staple ¼” down in the center of the combined sliding panels. You might want to position your graphic in the window before placing your staple.
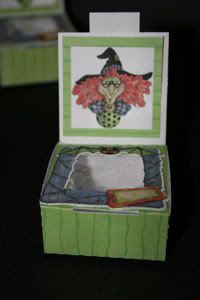
7. Now the magic begins. Slide the magic panel between the cardstock and the clear sheet. Fold card into position, poke the ribbon through the top notch. I pull magic panel up through the slot to make sure it will move freely. Glue bottom flap closed to front window panel.
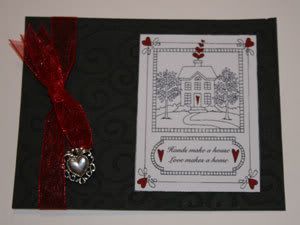
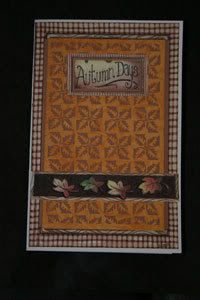
8. The light weight cover can now be added and embellished. Template will be posted Monday.

LinkWithin

Related Posts with Thumbnails