Showing posts with label embossed. Show all posts

Saturday, June 30, 2012

Thank You Pocket Card


One can never have enough thank you cards around.
1.  The envelope is 9" x 4 4/3". 
2.  The inside card is 5 1/2" x  4". 
Depending on what glue you use to close the envelop.
You might need to trim a 1/4" off for a better fit.
3. Arched the top of the inside card and
rounded the  bottom corners.
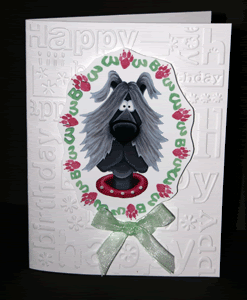
4. Used graphics from the old pccrafter site by
Kimberly Montgomery "Peace and Kindness".
I could not find where her graphics are for sale any more.

Wednesday, May 11, 2011

ATC Swap Challenge

So I am still working on tear bears. This ATC met the requirements of embossed. I added chalk edge of a Martha Stewart flower to make it stand out against the yellow background.
This was just a computer generated graphic by Laurie Furnell "In My Garden" that I purchased at pccrafter.com. I added a little glitter and pop dots to her and the bird houses.

Sunday, April 10, 2011

Tear Bear Wedding Card

The wedding theme was a mountain cabin setting. Bears are one of the couples favorites. I discovered a new process to create a tear bear. Still working on it, but I think this is better than my first one. I embossed the background with "Love Language" Cuttlebug embossing folder. It turned out pretty good. I hope they liked it.

Saturday, June 19, 2010

Blank Card


With the help of a Cuttlebug embossing folder, this card went together fast. I printed the check pattern on the bottom section of a quarter card size area; attached the ribbon, pearls and saying. The inside is blank but has a blue and white layer of 24 lb paper to set off the writing area.

This card was for Suntalee's very special day of going to the temple. She looked so beautiful and happy.

Monday, January 25, 2010

Baby Boy Card

Redesigned the stork card for a boy. I used Swiss Dot folder for my Cuttlebug for the background of the white. Inside is the negative of the rattle and blocks that spell boy. I cut everything with my Gazelle this time. I have not quite got the hang of converting WPC files into GSD.

I will be posting the final of the wedding announcements.

Saturday, January 9, 2010

Wedding Invitations

I was asked to create a wedding announcement for January with colors of white, black and red. They want a snow theme. I worked up these three selection to for a start. It will be fun to see what we end up with. Below I have given you closeups:

This Cuttlebug embossed selection has a band embellished with a snowflake cut with my Craft Robo.
This is a gate card. The white to the back is where the announcement would peek through or a picture of the couple. It is embossed with hearts and embellished with a heart brad and a snowflake cut with my Craft Robo.
This selection was embossed with swirls linked hearts and words from Cuttlebug "With Love", charm and red ribbon.
Vellum embossed snowflakes for the closure seals on the envelopes were printed black and then embossed with opaque power.
I will post the final announcement once it is complete.

Tuesday, December 22, 2009

Snowman Soup


Thanks to the graphics from Laurie Furnell at pccrafter.com, this cute little card was a snap to make. I printed a quarter card front with a tan background and snowman. On the other half of the card I printed the inside and the extra snowman for the front.
Using my Cuttlebug and the Swiss Dot embossing folder to give the front dimension, I cut the extra snowman out and used pop dots to raise him off the page. I picked up snowman marshmallows from Walmart. Plastic wrap holds the marshmallows in place and covered wire closes the wrap. Spoon is mounted with a pop dot.
Punched two hold through the package of cocoa, topper and front of card. The ribbon hold all three together. I made these for my granddaughter's teachers. Hope they like them.

Wednesday, December 9, 2009

Faux Snow Crystals

For the box below on yesterdays post, I made faux snow crystals. You start with two pieces of styrofoam and rubbed them together. The crystals have lots of sparkle but I did not like the bits of larger chunks that are in the crystals. I am still trying to find a solution. So if you have one please post.


Saturday, October 31, 2009

Think Pink

This was breast cancer month. I did these two cards for a swap using graphics from Heart & Soul by Laurie Furnell. The Perfectly Paisley Cuttlebug folder was used for the background and dimensionals to raise the stripe paper and parts of the card. The picture below was the first card I made; you can see how the embossing folder really adds.
Often you never get to see what they did on the inside. Thought you might like to see this one.

Saturday, June 27, 2009

Quick Birthday Card

This card can be made in a matter of minutes. Use a Cuttle Bug folder to emboss the flower and lightly chalk the embossing. Find a picture with a cute face and cut just the face out. Add a cute graphic with dimensionals and attach a bow.

Wednesday, June 10, 2009

Get Well Gel Embossed

Gazelle by Bosskuts gets the credit for this card. It is amazing machine. I'm still on the learning curve. Secured the corner with brads. Dimensionals were used under the get well.


The scroll was two cuts. The front scroll was cut in half for freedom of placement.
To make this card I used a Gelly Roll Stardust pen. The font is Edwardian Script. If you are intested here is the WPC file. I put the pen in first and selected only the font area. Then I selected everything but the font and cut. I can do a PDF if someone wants to convert to a GSD.

As you can see I'm back up and running in the camera department. Yeah!

Saturday, May 23, 2009

Get Well


The graphic is from "You are an Angel" at pccrafter.com. First layer was ran through the Cuttlebug with Swiss Dot folder. Second print was cut out around girl and glue dots were attached to the back to give some dimension. Fisker corner embossing punch was used on the corners. Touch of ribbon with add as a slider for the front tag. A gel sparkle pen gave an added touch to the flowers on her dress and to the stars in the lettering.

Saturday, April 18, 2009

Flower Card Swap


Although my time is very limited, I joined in a card swap on pccrafter.com. I used the same set of graphics for both cards. They are by Marie Cole. I embossed both with my Cuttlebug and added buttons, bling and ric rac. I also inclued matching envelopes.

Monday, March 2, 2009

Envelope Card


This card is so easy. It's almost done before you start. I used this graphic in the "Little Sentiments" collection by Carolee Jones found at pccrafter.com

I printed two on an 8.5" x 11" sheet of 65 lb cardstock. There was enough room for extra flowers and two yellow strips down the front.  I used dotted swiss Cuttlebug embossing folder on the flap and strip for the front of the card.  With my ATG gun I attached the embossed strip and use tacky glue for the flowers. Once the flowers were dry, I touched up the center of the flowers with a sparkle gel pen.


Monday, December 1, 2008

Christmas List Folder


I needed this about a month ago. But it is never to late to get your list for Christmas started. This folder is made with a 6" x 12" DCWV Christmas paper. 


A I folded the outside paper in half and then fourths. I attached a velvet ribbon and a jeweled magnet closure to the front cover. The metal disc is mounted under the ribbon.


The inside striped paper is from the same DCWV Christmas stack. I cut 4 strips 3 3/4" x 9". I liked the inside trimmed an 1/8" smaller in width to make it fold nicer. The pocket is formed by folding 3" up. I embossed the 3" part with Swiss Dot Cuttlebug folder. Then at random I folded down the corners to reveal continuous stripe pattern. 

Here is a folder for your Christmas lists: Family List, Friends/Neighbors, Food List, Special Notes. I am just waiting for the pads to dry and will post a picture of the note pads for the inside in a couple of days.

Saturday, November 22, 2008

Pen Card Insert

We are always getting the nicest pens in the mail for permotions. It is such a shame to let them just sit in my drawer at work.  I decided to see what I could do for a thank you or appreciation card. I used DCWV Embossed paper stack and Far East collections for this card. I cut around the packaging bubble from the advertizer to make the pen holder for the card. 
 
The retangle cut for the opening of the pen bubble I glued to the back for the pattern is continous.  I attached the ribbon tab on the inside with a flower shaped eyelet and added a magnet closure to the back.

Saturday, August 23, 2008

Not much time to play this week. I have been busy registering students. Here is a quick birthday card I embossed with my Cuttlebug and added Mitzi graphic from pccrafter.com. I started with colored cardstock 8” x 5 ½”, white cardstock 11” x 5 ½”, Mitzi graphic and wording on photo paper. Emboss half the white cardstock, fold in half, and mount on the upper portion of the colored cardstock. I use a Scotch ATG machine for mounting. It is the best invention. Next trim around graphic and wording; mount wording on scrap white and colored cardstock and attach to card. Mitzi is mounted with pop dots (HINT: Because of the large area, I used only the scrap area around the pop dots.) I had a strip of colored cardstock I did not want to go to waste, so I used it to embellish the card and envelope. See ya Monday.

Saturday, July 5, 2008

Woof U Happy B-Day


This card is for the dog lovers out there. I used my cuttlebug Happy Birthday background and graphic is from Fleabag at pccrafter.com. I used pop dots for a dimensional look.

LinkWithin

Related Posts with Thumbnails