Showing posts with label adhesive. Show all posts

Saturday, March 21, 2009

Recycle Glue Tape to Adhesive Dot


I love using adhesive dots for my projects but they are so expensive. On the project above, I used homemade small dot for the button and a large dot on the flower.  They work wonderfully. Here is a picture of the two sizes I used. Hint: don't put them so close together.

I recycled the used roll from my ATG and I recycled postage stamp sheets. I also saved the wide paper, roll and box from use Glue Dots. I found the stamp sheets hard to store and probably won't use them again. The glue I used was Aleen's Tack it Over and Over. The small dots and thin 1/2" dots only need 24 hours to dry. The 1/2" thick dots, I let dry for two days.

 I used an empty 1/2" ribbon roll for the ATG strip. For the small dots I liked the shallow roll instead of the deeper.

Thanks to Linda, here is a video instruction from Stampbuster  on making your own glue dots. 

Monday, March 2, 2009

Envelope Card


This card is so easy. It's almost done before you start. I used this graphic in the "Little Sentiments" collection by Carolee Jones found at pccrafter.com

I printed two on an 8.5" x 11" sheet of 65 lb cardstock. There was enough room for extra flowers and two yellow strips down the front.  I used dotted swiss Cuttlebug embossing folder on the flap and strip for the front of the card.  With my ATG gun I attached the embossed strip and use tacky glue for the flowers. Once the flowers were dry, I touched up the center of the flowers with a sparkle gel pen.


Saturday, February 28, 2009

Blank Card


In just minutes, you can have five cards completed with four pieces of card stock. I used "Doodle Heart Valentine" graphics by Laurie Furnell. They can be purchased at pccrafter.com
1. Because the front of the card is doubled, I used 67 lb. card stock. Here is how I printed out the graphics to achieve 5 cards.

2. Cute paper in half at the 5 1/2". Then the piece on the left needs to be cut in half at the 4 1/4".

3. I used the "Love Language" embossing folder in my Cuttlebug on the front panel. I did not want the lace part of the graphic embossed, so I place the edge of the folder along the graphic line.

4. Here you can see a close up of the embossing. You can also see that I used two copies of the border layered together. It does not matter how they meet, because the medallion will cover the connection up.
5. Fold the butterfly portion of the card in half, with the butterfly inside.

6. I lined up the embossed panel and the front of the card together and trim along the second line of the border graphic with mini scallop scissors.

7. Use your favorite glue method to adhere the embossed panel to the front of the card. I love my ATG gun.
8.Make sure you line up how much of the white you want to show. Flip card over and trim the excess from the front panel along the fold. Cut out the medallions.  Add a pop dot to the back of the medallion.

9. Place the medallion on the front border. I used it to cover the junction of the border.
Here you are a completed card. I like the pattern so well I made another set that was wide instead of tall.

Monday, September 22, 2008

Witch Wrap


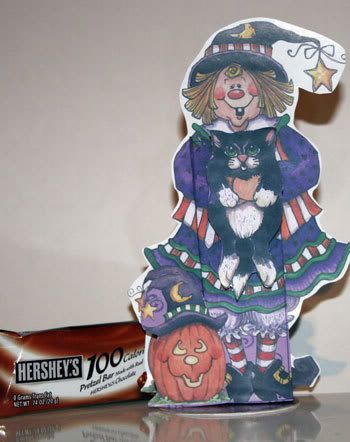
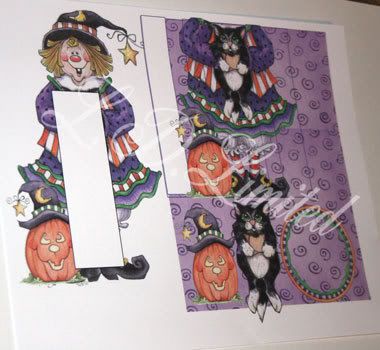
Need an idea for Halloween. How about a chocolate covered pretzel treat inside a cute little witch by Laurie Furnell. The measurements for the cover portion is 1 3/8" x 5/8" x 4 5/8".  I am including a picture of the layout. I would be happy to give you a template, but it really needs to fit the graphic. If you purchase this graphic and need the template let me know, I will be happy to share with you. Even though it is only a small portion, I have covered the graphic with a white triangle to save a little on ink. I used brochure 32 lb paper and the base is clued to a circle of cardstock.  My favorite method of double sided glue, ATG gun. With 7  pretzel packages in a box, I am in this cute treat less than fifty cents. You can purchase the graphics at pccrafter.com.

Saturday, August 23, 2008

Not much time to play this week. I have been busy registering students. Here is a quick birthday card I embossed with my Cuttlebug and added Mitzi graphic from pccrafter.com. I started with colored cardstock 8” x 5 ½”, white cardstock 11” x 5 ½”, Mitzi graphic and wording on photo paper. Emboss half the white cardstock, fold in half, and mount on the upper portion of the colored cardstock. I use a Scotch ATG machine for mounting. It is the best invention. Next trim around graphic and wording; mount wording on scrap white and colored cardstock and attach to card. Mitzi is mounted with pop dots (HINT: Because of the large area, I used only the scrap area around the pop dots.) I had a strip of colored cardstock I did not want to go to waste, so I used it to embellish the card and envelope. See ya Monday.

Saturday, August 9, 2008

Faux Chipboard

Photobucket


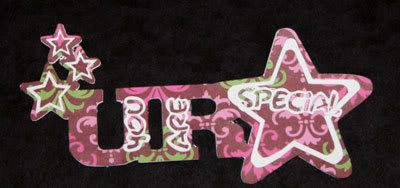
I love the look of chipboard. Unfortunately I can not cut chipboard with my model of Craft Robo. Here is how I created my Faux Chipboard:
Photobucket
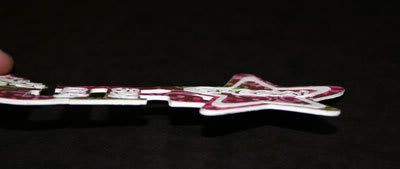
1. cut 4 blank templates on heavy cardstock (I used 110 lb.)
2. glue the 4 templates together (I use wet glue the first time. It curled slightly and took a long time to dry)
3. cut top layer with words out of light weight patterned paper
4. glue to the top of the cardstock
Photobucket
Here is the GSD template for my Faux chipboard. This template will give you two different options.

LinkWithin

Related Posts with Thumbnails